

See that sign? The one with the stern red slash through a lightning bolt? It’s the venue’s version of a papal decree: “No Flash Photography.” For most, it’s a buzzkill. For you, it’s about to become a secret weapon.
Being forced to ditch the on-field flash isn’t a limitation—it’s liberation. It pushes you to truly see the light you already have. That harsh midday sun or moody overcast sky? That’s your new studio.
Think of it as photographic jazz. You’re improvising with the ambient notes already in the air. The core skill here, as any pro will tell you, is mastering ambient light metering. It’s the entire symphony, not just the backing track.
Your first move is to scout the venue like a director scouts a film location. Identify light sources, shadows, and reflective surfaces. This reconnaissance is your pre-game strategy. You’re trading the guide number for guile, using the existing architecture to sculpt your group’s portrait.
This approach isn’t about loss. It’s about gaining a sharper, more authentic image. By understanding the available light, you can capture the energy and cohesion of a squad without the harsh, artificial look of a flash. It’s the foundation for settings for crisp action shots in any environment. Consider this your playbook for turning a restriction into your greatest advantage.
Using Natural Light and Reflectors
Mastering reflectors is about working with the light you already have. You’ve ditched the flash. Now, you’re using the same light as the old masters. Your job is to shape it.
Imagine that harsh light at a noon game. It makes unflattering shadows under helmets. Instead of using flash, you use a reflector to soften these shadows. It’s like fill-flash, but without the extra gear.
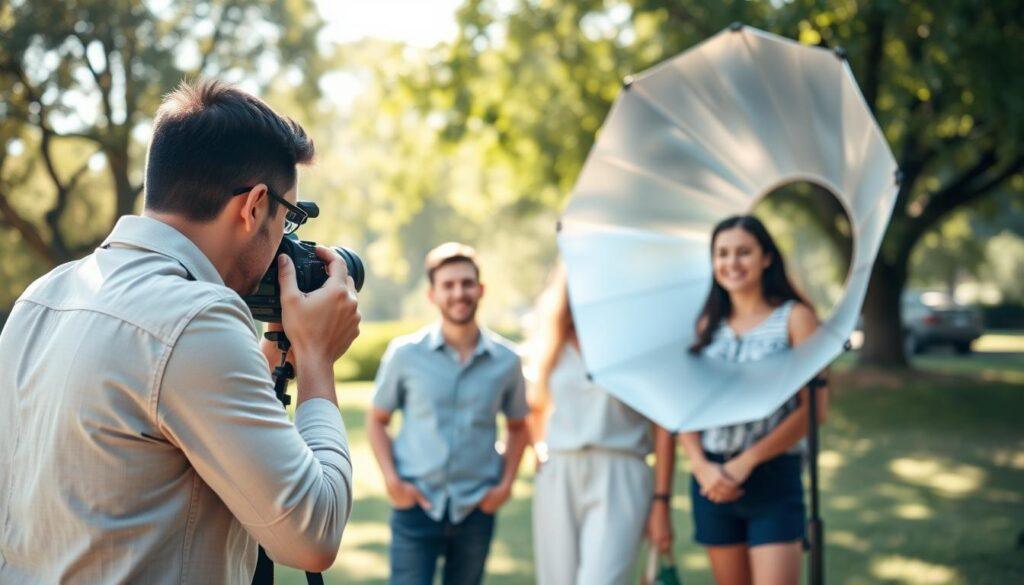
First, observe the light. Is it harsh or soft? Your reflector’s role is to balance the light on your subject’s face. Place it low to counteract overhead shadows. For the golden hour, a gold reflector adds a warm glow.
Here’s a quick guide to your diplomatic toolkit:
- White: The neutral ambassador. Provides a soft, clean fill light. Perfect for most situations.
- Silver: The efficiency expert. Bounces more light, giving a brighter, crisper fill. Great for overcast days or low light.
- Gold: The warmth specialist. Adds a sunset-like hue, ideal for matching late afternoon light.
- Panel (Large): The crowd-control negotiator. Acts as a giant, portable softbox for evening out light across an entire team.
This isn’t about brute force. It’s finesse. A well-placed reflector can turn harsh light into a masterpiece. It can also add depth to overcast light. You’re not fighting the environment. You’re working with it.
So, hold that disc. Watch the light change on your subject’s face. See how the shadows soften? That’s the magic. You’ve just conducted a symphony of sunlight with a piece of fabric and some wire. Far more elegant, don’t you think?
Quick Posing and Spacing
Let’s forget about light physics for now. We’re diving into human geometry. This is when a photo turns into a portrait. You’re not just a tech expert. You’re more like a theater director, setting up a scene.
The simplest rule is to have subjects face away from the sun. It’s not about sunbathing. It’s about avoiding squinting. This way, everyone gets a nice, even glow on their face. For one person, it’s straightforward. But for a group, it’s a complex dance.
You’re solving a three-dimensional puzzle. Every face needs to catch the light. The solution? Stagger your rows. Create depth. If you have a back row, put them on a bleacher or a step. This isn’t just about fitting everyone in the frame. It’s about ensuring the person in the back isn’t lit like a witness in a protection program.
This choreography affects your gear. If you’re using continuous light—like powerful LEDs—your posing decides where those lights go. You wouldn’t blast a flash directly at a flat wall of people. The same logic applies. Angle your continuous light source to rake across the group.

Think of it as political commentary. You want to avoid creating a monolithic bloc. A flat, evenly lit group feels static, like a mugshot lineup. By using intelligent spacing and angled continuous light, you create highlights and shadows. You build separation. The light sculpts the group, giving it dimension.
This raking light from a continuous light setup is your brushstroke. It turns a collection of individuals into a cohesive, dynamic portrait. The space between people becomes as important as the people themselves. That’s the difference between a record and a story.
Exposure Settings and White Balance
Your team is ready. The light is set. Now, the camera needs to capture what you see. Without flash, you must adjust shutter, aperture, and ISO to the continuous light. For a sharp jump shot, use a fast shutter. To keep everyone sharp from front to back, close down the aperture.
In bright light, you might need a neutral density filter. It’s like wearing sunglasses for your camera.
Color is next. Stadium lights or gym fluorescents can make skin look green or orange. Auto White Balance often gets it wrong in mixed light. To get a natural team photo, take charge. Use Daylight preset for sunny spots or set a specific Kelvin value. Mastering white balance makes your team look real, not like sci-fi extras.
Getting these settings right under continuous light makes your photo look magazine-quality. It’s the secret to a timeless team photo. You don’t need a bright flash to make everyone look great.